Showing posts with label wool. Show all posts

Saturday, 6 June 2009

workshop with Karoliin en Rod

Well, it's taken me a bit (lots of things have happened this past week!) but here it is. I apologise for the quality of mostly the later pics because I dropped my pretty camera after the first day and it is kaput...dead. Yes, how could I drop a digital reflex...I know. Until next week when I buy a new one, I have no great pics of the finished thing...sorry!)

Karoliin Arvilommi is a textile artist, a weaver initially, who has been a felter for more than 20 years. As you can imagine, she has gathered a few tips in that time. Rod Welch, her partner, took up felting when they met. They both have different methods of felting and treating their designs -matching their own personalities, naturally- but both are 1-very creative, 2-very experienced, 3- very nice and most importantly, incredibly generous. Although this workshop was on hand felted tapestries and carpets; they did not mind at all talking about how they treat their finn wool, what dyes they use and why, different techniques they use for working with wool and felt in particular, machines Rod has developed, the state of the wool world these days, etc. That was for me the most important part of the workshop... the amount of tips one picks up here and there whilst talking to other felters.
The other 10 women whom joined the workshop were also a delight to have around. Many talented, creative felters whom have been working for a long time in this subject and of course that means that each person had a different way and tempo for doing things. But the results were equally stunning.
A special word goes to Annemie Koenen, who organized this workshop at her Atelier Wolwerkplaats MoerderAarde (dutch for "wool working place, Mother Earth") which is basically her home. Her warmth, laughter, advice and the general organization of the weekend was fantastic. The catering was delicious and abundant and boy... her atelier is like a candy store for wool lovers. Wool, silk, fabrics, linen... fibers hanging everywhere drying after being hand dyed or spun; a large library for inspiration and an equally large book selection for sale. Needless to say we all left with a few books and bags of fibers under our arms.

Now the workshop itself.

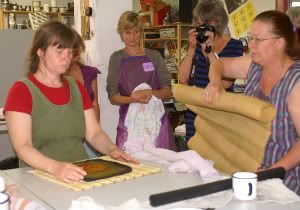
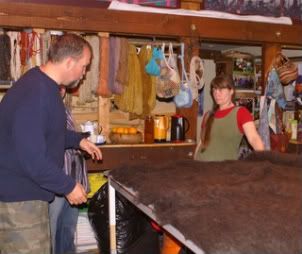
Karoliin and Rod working out how to deal the precious finnwool.

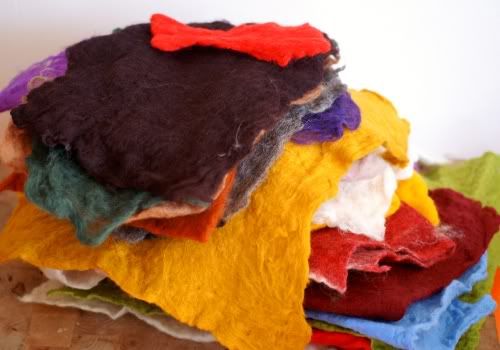
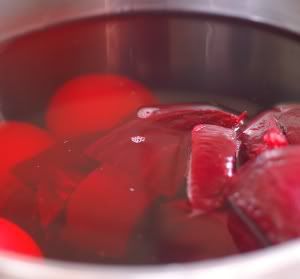
We started by talking about our ideas and designs for the weekend. What was feasible, what colors, etc. A word on finn wool: there are only a few thousand pure finn sheep left in Finland and their wool is...nothing like what I've worked with before. I've tried merino of different microns, camel hair, mongolian wool, Gotland, australian, new zealand, shetland, argentinean, bergschaap, etc... this wool was so soft and yet sturdy! Fantastic.
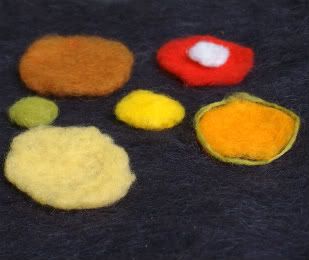
We first received a demonstration from Karoliin: how many layers (many!), working with prefelts or with lightly hand felted pieces of wool, edges...important for a neat finish, lightly spinning yarn with your hands for details, etc. The idea was that first we would make a small test to get a feel of the wool and practice what we had just received in form of theory. My "small" test wasn't that small..oops.... but I did realize that making this test, although not always necessary, is very useful... you can finish working your own design out before moving on to a much larger piece.

Karoliin en Annemie.

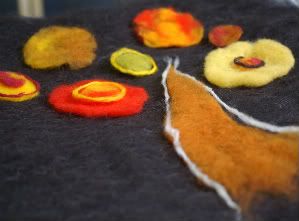
Armed with almost 2kl of finn wool I set up to lay layer upon layer of wool. It is -as always with felting- of crucial importance how well you lay your wool, how evenly and in which directions. I had decided that more than making a master piece, I wanted to be able to learn the technique and finish the piece. So "keeping it simple" was my motto. I then choose to -insted of working with prefelts- make the design by felting dry wool. Note that there is no use of needles or anything like that. This is all done by hand.


The first day went by working on this little test. I had to go home at 6pm (motherhood!) but many stayed at the studio working until late at night.


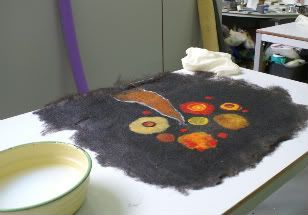
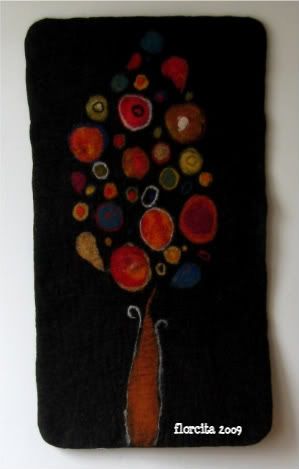
Next day I started on my big piece. It took some time and work to lay the background (imagine something like 1.5kl of wool...huge volume that is) . My rectangular piece ended up being 1m x50cm... that is after 2 full days of felting... initially it was not only much larger but also thick!I measured my layed wool before wetting, and it was 20cm high!
Hands rubbing until arms ached... and then some more. I think I spent all of saturday and half of sunday just working on my piece by rubbing it with my hands, nothing more. Rolling was at the very very end and it was intensive too. I came home feeling as if I had been at the gym the whole weekend! You need strong arms for this!


Rinsing was done by throwing liters upon liters of water onto the work and rolling it out with a rolling pin. I ussually do that myself because it also helps flattening your piece and in fact, you keep felting that way. But at this point in the weekend I was so tired I didn't want to roll anything else! Lucky for me, and for most of us, Rod was standing there all fresh and strong ready to take over and do it for us. Thanks for that.
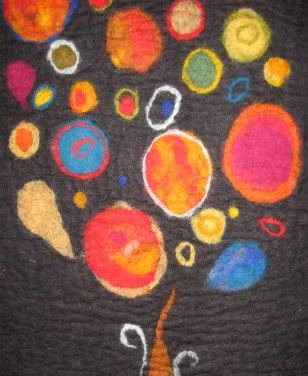
So here the finished piece (sorry for the dark pic!).


I take from this weekend a whole lot of knowledge, but also warm memories of laughs, stories, faces of people with whom I learnt a lot. Not only from the fantastic Karo and Rod whom honoured us coming down here from Finland (which they don't ussually do); but also from the rest of the felters I met this weekend. Their opinnion, advice and help was invaluable.
I am most definetely signing up for another workshop at wolwerkplaats Moeder Aarde. (click on that link for some reviews of this workshop from other felters - in dutch- or a little bio from Rod and Karoliina in english).

Wednesday, 29 April 2009

Prefelts


Prefelts are pieces of felt which one can buy or, if you are not too lazy, make your self. The difference with the normal felt is that these sheets of felt aren't fully felted. They are ussually used by felters whom especialize in wall art, tapestry or rugs; or indeed any felted work with lots of intricate designs in different colors. The advantage of prefelt is that you can cut a figure out from your pre- felted sheet, and add it to your design which later gets fully felted with the rest of your work. It's not difficult to use them but it doesn take a bit of practice. However, they do simplify your job and allow you to do more intricate designs.
So, I had to make some for a few projects I have in mind, and also because it is always handy to have some in stock.
Technically speaking, the thickness of your prefelt, if you wish to make them yourself, should take an account the thickness of the finnal project you have in mind... you have to think that if it is too thick it will take longer to felt, or stick out; but if they are too thin they might get lost in the background color. I made this pile of about 3 thin layers of wool. Solid, bright colors.
And now to work!

Wednesday, 22 April 2009

List of vegetables for dyeing

Looking a bit more into this dyeing business, I found a list of vegetables with the possible colors one can get from them. The method itself, was the same. So here:

Light Purple: small quantity of grape juice
Violet blue: red onions skins
Blue: Canned blueberries, red cabage, purple grape juice
Green: spinach, grass
Yellow: orange or lemon peels, carrot tops, ground cumin, ground tumeric
Brown: strong coffee
Orange: yellow onion skins
Pink: beets, cranberries
Red: lots of red onions skins

And then I found another list of possible dyers but not the colors one would get... so if you try them, tell us!

Marigold flowers
Tansy flowers
Dahlia flowers
Walnuts
Apple leaves
Oak leaves
Crushed pomegranates
Onion skins
Corn husks
Walnuts

So there... if you know of anything else, we can add to the list!

Another interesting link from a website called Pioneer Thinking. There is a long list of plants and the colors you might get.
I suggest you check Jenny Dean' s website and books. She is a guru in natural dyeing and a very generous person. Wise and fun!

Monday, 20 April 2009

How to dye wool with veggies-Tutorial

I've been meaning to do this for a while but I was always a bit scared, not sure of proportions and the rest. I read words like alum and creme of tartar...and froze not knowing precisely what that was (and couldn't figure out the proper translation to my mother language, spanish). So, while I was waiting to figure it out (hopefully in a workshop soon); last week I had to dye Eastern eggs. My husband said he was the expert and since we don't have the "egg hunt" in Argentina, little I knew about this whole egg situation. But then, when he was dyeing them with onion skins I thought...hmmm...this could work with wool as well... and grabbed some regular merino and threw it in the pot ...not with the eggs, don't worry. So, for those interested... keeping in mind I am an amateur experimenting and I didn't have an especific recipe but more of an informed guess (read a lot, mixed it all up).

First you have to make your dye... you can experiment with a lot of things. I'll use the golden onion skins as an example (I suppose one can use red onions too and achieve another color).
You use only the golden outter layers. Peel them off -about 5 onions- and then add them to a pot with water and about 5-10grms of salt/2 tablespoons.The salt helps fixate the dye to the yarn, wool, fabric, etc. Take that to a boil and then cook it for about 25minutes. Then strain it (the onion skins you can throw away).


In the meantine, pre soak what you will dye -wool in my case- in water and normal vinegar. Measurements? eeerrrm... a couple of glugs... nothing scientific here. For what I understand the vinegar helps the wool prepare and take the dye better. Let it soak while the dye is cooking. Rinse.
*If you are going to dye unspun wool (as in the wool you use for felting) try no to move it too much or rubb it because otherwise you will end with felted roving...remember: water, movement and wool are what make felt!

Once the dye was strained and the wool rinsed, gently dip the wool into the dye (*don't stir too much... remember: felt!) and "cook" -with the lid on or your dye will evaporate- for about 30minutes (or when the wool is a bit darker than what you want it to look when it is dry. Remember that with water, colors look brighter!).


When you think you have achieved the right color, take it off the fire, and let it cool. Then remove gently, rinse until you don't see any more color coming out ( I didn't have any!) and let it dry undisturbed!


*One last note for those whom might want to dye unspun wool: don't forget that if you "cook" it for too long, the wool will start felting too... warmth, water and the movement in the pot will make the fibers entangle and a bit stiff.

My other experiments...
-spinach: green
-spinach + tumeric: fluorescent green! :)
-carrot + orange peel + 1 spoon of cinamon: a pinkish-orangey... LOL looks likea cake recipe!
- beets: same steps as before...


Left: beets
right: onion skins.

Hope you give it a try and have fun!

Tuesday, 27 May 2008

While it rains

Well, that was it for spring apparently. For the last couple of days we have had nothing but rain, rain and...yes, more rain.
Gloomy weather means to me staying home and trying to do something creative. I had some wool laying around, bits and pieces from other stuff I made some time ago, so I had to transform the raw materials into something new.

These are much easier, faster hand felted bowls. Smaller in size and rougher the shape. I like them. My friend Reya taught me how to make them in our first felting day a few months back. I decided to experiment a bit with adding yarn to it like chenille and some hand spawn two colored yarn I brought from Argentina a few years ago (to work with in a loom).

My mom sent me a bag of goodies full of (candy and) buttons. Hand made buttons: wood, leather, hand painted ones. So I used a hardened leather brown leaf button for one of the bowls, and some wooden and matching green buttons for the other one.


...that is just a beautiful yellow poppy from my garden!


Here, the leaf button (made of hardened leather) sent by my Mom (which means that this bowl then, is international! :P )


They are both now for sale at my Etsy shop: www.florcita.etsy.com (there is something going on with blogger and is messing up all my links, so please, copy and paste on your navigation bar!).


Thanks for coming by!

Wednesday, 21 May 2008

Bowls spree!

Yesterday a company came over to work in our house. This is a very old house which, when we bought it, had been left untouch since it was built in 1948. It was fun and a challenge for us to bring it to these days and age, and we are still busy ... but everything has been done with our own hands which takes longer. There are certain things, like insulating your walls, that one just can't do. We dont have the equipment. So, these people came, drilled 150 holes on the outside walls of our house and then, through them, filled the gap between the outside and inner wall ( each wall is formed by two single brick walls. In the middle, air...till today) with terlgopor little balls.

While this was taking place, I couldn't leave the house. So I took out my wool, water and soap... and worked on some stuff.

I've been meaning to do some felted bowls for the etsy shop I'm setting up (I don't want to have the same items on both Dawanda and etsy's shop). I just grabbed 3 different wools: La Plata broken white, red merino (love it!!) and some Gotland Island grey. I added to the mix some red linen fibers and some cotton yarn I had laying around.

Making bowls is an experiment in itself... adding stuff, shaping it...and then hanging it to dry. This is what I came up with:


Individually:

Crossroads bowl


Dots bowl:


Nerves bowl:


Red melting bowl:


So, what do you think?
By the way, they are now for sale at my etsy shop: www. florcita.etsy.com